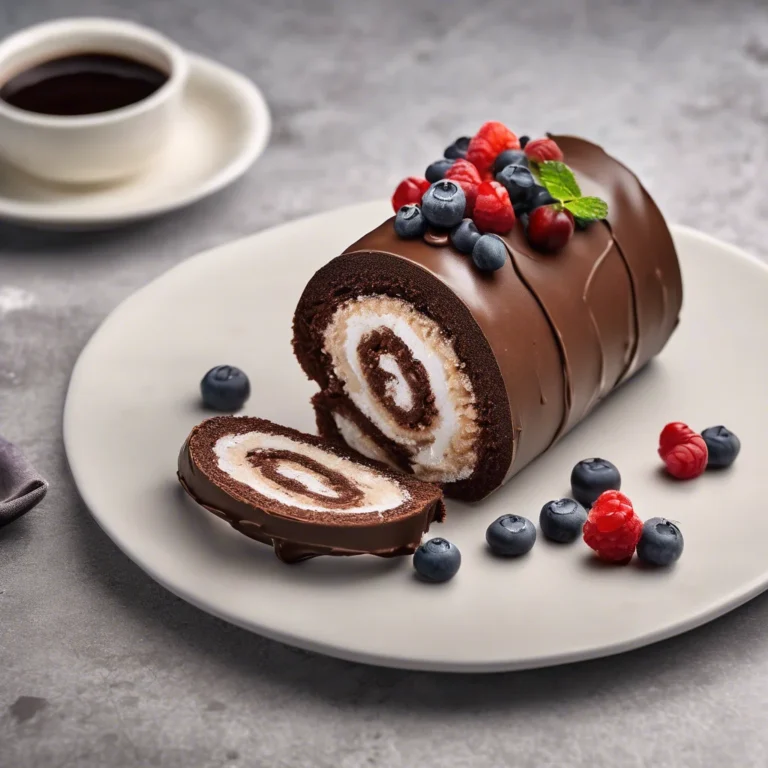
Decadent Cookies and Cream Oreo Cake Roll: A Chocolate Lover’s Dream Come True
Celebrate the ultimate chocolate indulgence with this irresistible Cookies and Cream Oreo Cake Roll recipe, featuring rich dark chocolate cake, creamy Oreo whipped cream filling, and a velvety chocolate ganache topping.
This Cookies and Cream Oreo Cake Roll Is What Chocolate Heaven Tastes Like
I still remember the first time I bit into a Cookies and Cream Oreo Cake Roll. The combination of the moist dark chocolate cake, the crunch of Oreos, and the creamy whipped cream was absolute magic. It was like a party in my mouth, with every flavor complementing each other perfectly. If you’re a fellow chocolate enthusiast, you’re in for a treat.
As I began experimenting with this recipe, I was determined to get it just right. I wanted the cake to be soft and pliable, the filling to be creamy and rich, and the ganache to be smooth and indulgent. After a few trial runs (okay, more than a few), I finally nailed it. And let me tell you, it’s worth every minute of effort.
If you’re looking for a show-stopping dessert that’s sure to impress, look no further than this chocolate cake roll. Whether you’re celebrating a special occasion or just want to treat yourself (because, let’s be real, you deserve it), this recipe is sure to become a new favorite.
Why This Is the Only Cookies and Cream Oreo Cake Roll Recipe You’ll Ever Need
So, what makes this Cookies and Cream Oreo Cake Roll so special? For starters, it’s incredibly versatile. Imagine serving it at a holiday gathering, a birthday party, or just a cozy night in with friends. The rich, dark chocolate flavor is sure to satisfy even the most discerning palates, while the Oreo whipped cream filling adds a fun and playful touch.
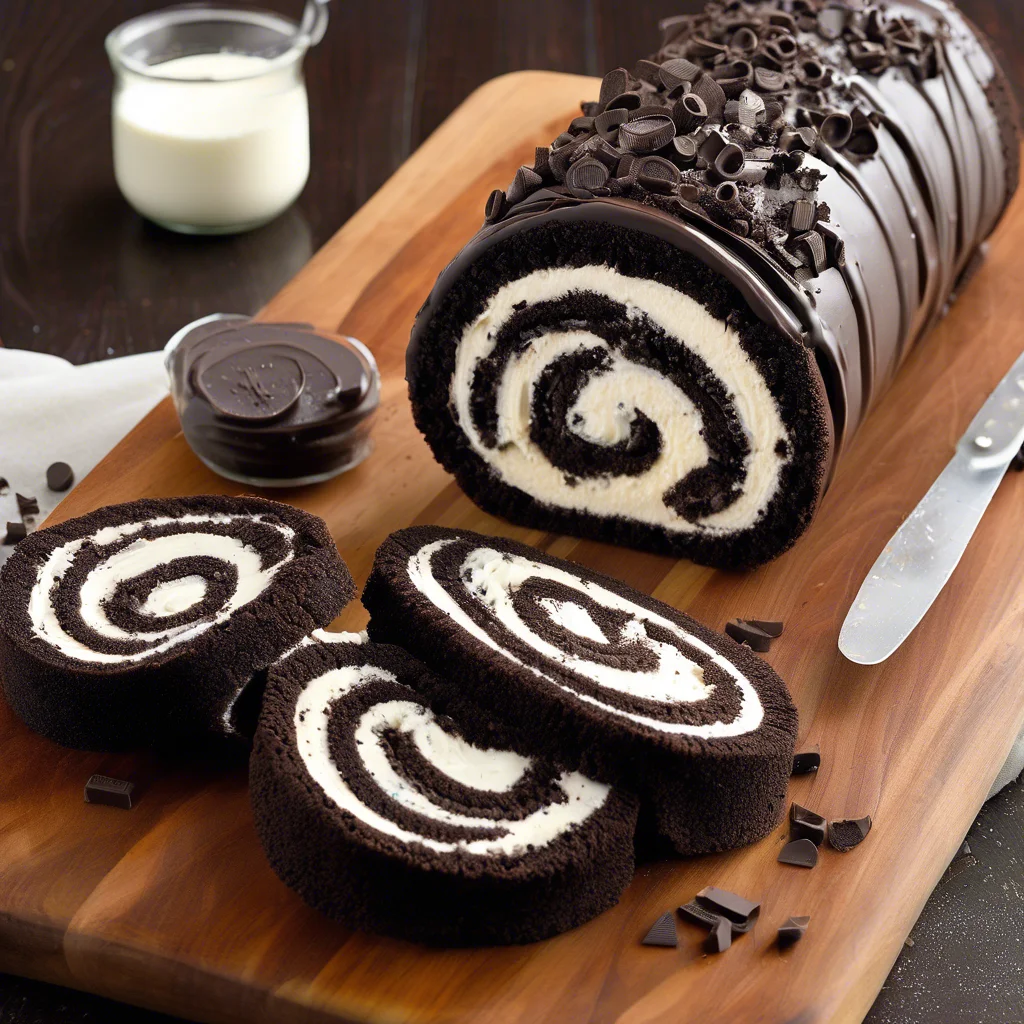
But what really sets this recipe apart is its impressive presentation. When you slice into the cake roll, the layers of chocolate cake, creamy filling, and velvety ganache are revealed, making it a stunning centerpiece for any dessert table. And the best part? It’s easier to make than you think!
What You’ll Need (Ingredients)
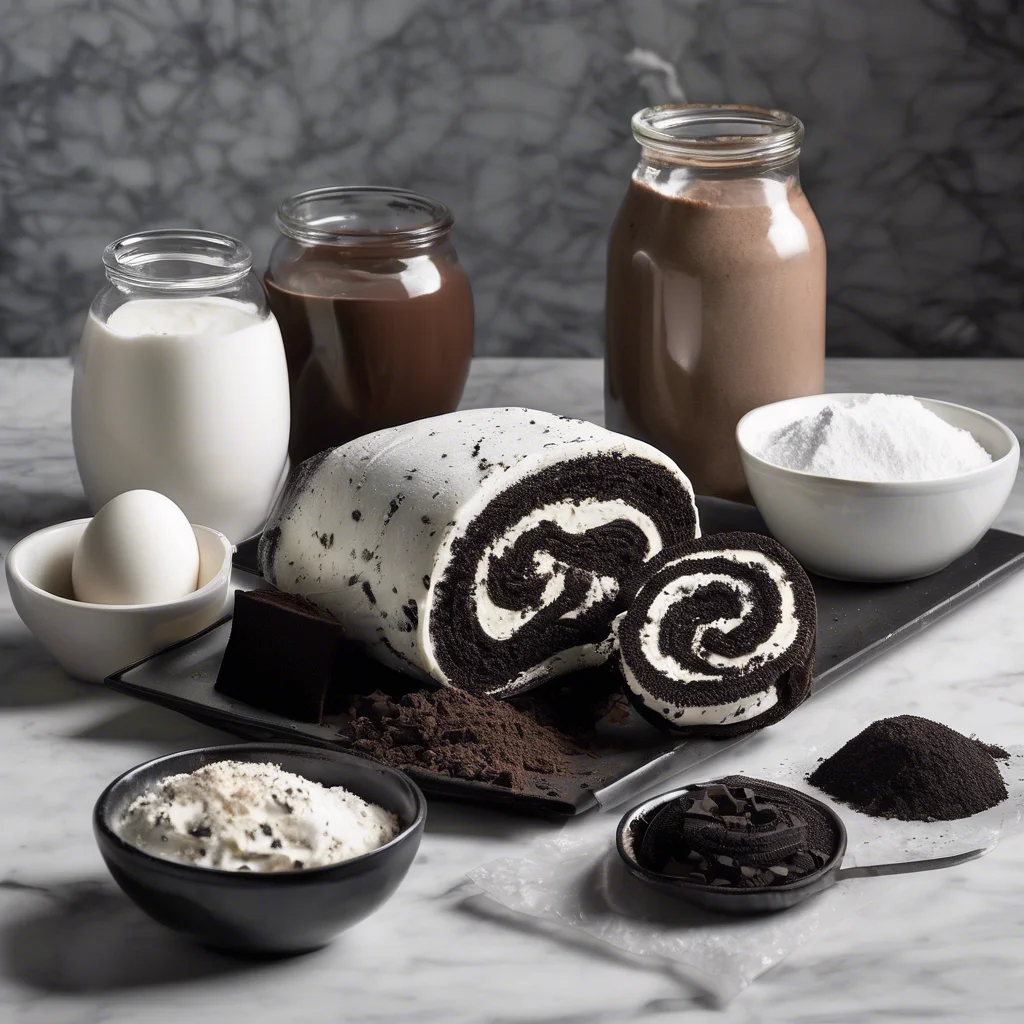
Before we dive into the nitty-gritty, let’s take a look at what you’ll need to make this decadent dessert. Here’s a rundown of the ingredients:
- For the Cake
- ▢3 large eggs
- ▢¾ cup (150g) granulated sugar
- ▢2 teaspoons brewed coffee or water
- ▢1 teaspoon vanilla extract
- ▢¼ cup (20g) unsweetened dark cocoa powder (i.e. Hershey’s Special Dark or Dutch Process)
- ▢¼ teaspoon salt
- ▢1 teaspoon baking powder
- ▢¾ cup (93g) all purpose flour
- ▢Powdered sugar to aid in rolling
- For the Filling:
- ▢¾ cups (177ml) heavy whipping cream
- ▢1 tablespoon (7g) powdered sugar
- ▢1 teaspoon vanilla extract
- ▢12 Oreos crushed
- For the Topping (optional):
- ▢½ cup (118ml) heavy whipping cream
- ▢1 cup (170g) semi-sweet chocolate chips
Prep, Cook Time & Tools
Before we get started, let’s talk about the time and tools you’ll need to make this Cookies and Cream Oreo Cake Roll. The total time is around 4 hours, broken down into 48 minutes of prep time, 12 minutes of cook time, and 3 hours of cooling time. As for tools, you’ll need a jelly roll pan (10×15”), a mixing bowl, an electric mixer, and a whisk attachment.
I used my trusty old jelly roll pan, which has been with me for years. It’s a bit scratched up, but it still gets the job done. If you don’t have one, don’t worry – you can easily find one online or at your local baking supply store.
Step-by-Step: Let’s Make This Together
Now that we have our ingredients and tools ready, let’s dive into the step-by-step process of making this incredible Cookies and Cream Oreo Cake Roll.
Step 1: Preheat & Prep the Pan
Preheat your oven to 350°F. Line a jelly roll pan (10×15”) with foil and spray it with cooking spray (I like to use the spray with flour). This will ensure that your cake doesn’t stick to the pan and makes it easier to remove once it’s baked.
As you work on prepping the pan, take a moment to appreciate the simple joys of baking. The smell of flour and sugar, the sound of eggs cracking, and the feel of the cool butter between your fingers – it’s all part of the experience.
Step 2: Make the Cake
Beat eggs at high speed for 3 minutes, until frothy and dark yellow. Beat in sugar, coffee or water, and vanilla extract. The mixture will start to come together, and you’ll notice it lightening in color and increasing in volume.
As you beat the eggs, imagine the tiny air pockets forming, which will give your cake its light and fluffy texture. It’s a magical process, really!
Step 3: Whisk Together Dry Ingredients
Whisk together cocoa, salt, baking powder, and flour. This is where the magic happens, and your dry ingredients come together in perfect harmony.
Take a moment to appreciate the rich aroma of the cocoa powder – it’s like a warm hug on a cold day.
Step 4: Combine Wet & Dry Ingredients
Stir the dry ingredients into the wet ingredients just until blended. Be careful not to overmix, as this can lead to a dense cake. You want it to be smooth and even, but still retain a bit of texture.
As you combine the ingredients, imagine the flavors melding together like old friends. It’s a beautiful thing!
Step 5: Spread the Batter & Bake
Spread the batter in the prepared pan. It will be in a very thin layer, and you’ll need to use a wooden spoon or spatula to spread it to all the corners of the pan. Bake for 10-15 minutes. You’ll know it’s done because if you lightly poke the top with your fingertip, it will slightly bounce back.
As the cake bakes, the aroma of dark chocolate will fill your kitchen, making everyone’s mouth water. It’s like a promise of the deliciousness to come.
Step 6: Roll the Cake
While the cake is baking, set a clean kitchen towel out on a large work surface. Sprinkle liberally with powdered sugar (about 1/4 cup). As soon as the cake comes out of the oven, turn it over on the kitchen towel sprinkled with powdered sugar. Remove foil carefully.
Working at the short end, fold the edge of the towel over the cake. Roll tightly, rolling up the cake into the towel. Let cool completely while rolled, at least one hour (or you can wrap it overnight). This is where the magic happens, and your cake takes shape.
As you roll the cake, be gentle, but firm. You want it to hold its shape, but you don’t want to squish it. It’s a delicate balance, but trust me, it’s worth it.
Step 7: Make the Filling
Beat heavy whipping cream in an electric mixer fitted with the whisk attachment. (You can also use a hand mixer, but it will take longer.) Slowly add in powdered sugar and vanilla during beating. Beat until whipped cream forms. Stir in crushed Oreos, reserving a tablespoon or two for garnish.
As you whip the cream, watch it transform into a light and airy delight. It’s like a little piece of heaven in a bowl.
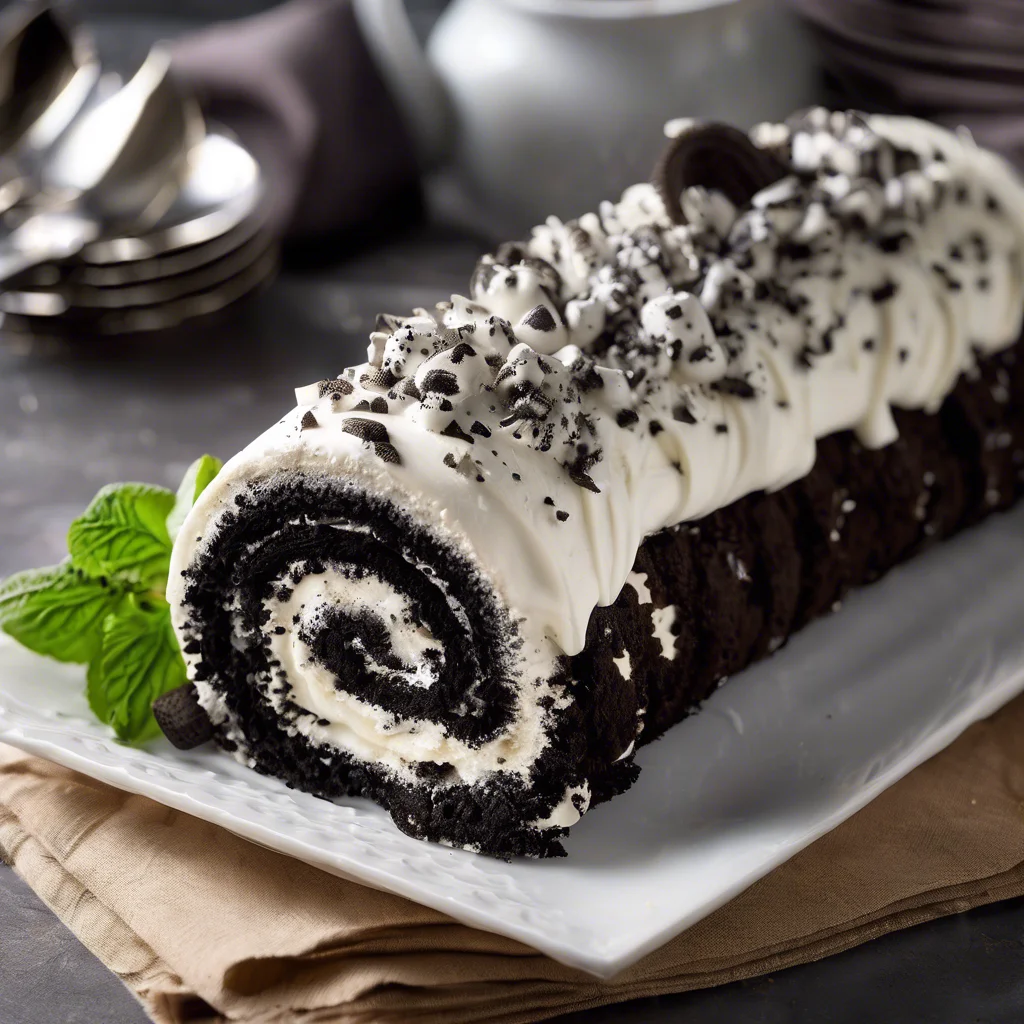
Step 8: Assemble the Cake
Once the cake has cooled, unroll it carefully. Spread the whipped cream on the cake, leaving 1” without filling at either end. Re-roll cake, scooping out any filling that spills out as you roll. Cover with plastic wrap and chill for at least one hour before frosting.
As you assemble the cake, be patient and take your time. You want to make sure everything is just right, and that the filling is evenly distributed. It’s a bit like a puzzle, but the end result is worth it.
Step 9: Make the Topping (optional)
Place chocolate chips and heavy whipping cream in a microwave-safe measuring cup or bowl. Heat on high power for 60-90 seconds or until the cream is hot, then whisk until smooth. Let cool for 10 minutes.
As you make the ganache, imagine the rich, velvety texture and the deep, dark flavor. It’s like a chocolate dream come true.
Step 10: Glaze & Serve
Place cake roll on a wire rack set over a cookie sheet. Pour the ganache over the cake evenly. Top with remaining crushed cookies. Chill until set.
As you slice into the cake, the layers will be revealed, and the anticipation will be worth it. The combination of the moist cake, creamy filling, and rich ganache is pure bliss.
Serving & Garnishing Tips
When it comes to serving this Cookies and Cream Oreo Cake Roll, the possibilities are endless. You can serve it as is, or get creative with your toppings. Some ideas include:
- Serve on a pretty plate and act like you didn’t eat half of it while cooking (because, let’s be real, you probably did).
- Garnish with additional crushed Oreos or chocolate shavings for added texture and flavor.
Storage, Shelf Life & Leftovers
To keep your Cookies and Cream Oreo Cake Roll fresh, store it in the refrigerator until right before serving. The whipped cream filling can get warm and lose its texture if left at room temperature for too long. You can store leftovers in an airtight container in the refrigerator for up to 3 days.
Final Bite: Why I’ll Always Love This Cookies and Cream Oreo Cake Roll
This Cookies and Cream Oreo Cake Roll is more than just a dessert – it’s an experience. It’s a combination of flavors, textures, and emotions that come together to create something truly special. Whether you’re making it for a special occasion or just because, I hope you enjoy it as much as I do.
So go ahead, give it a try, and let me know how it turns out! I’d love to hear your thoughts, and I’m always here to help if you have any questions. Happy baking!