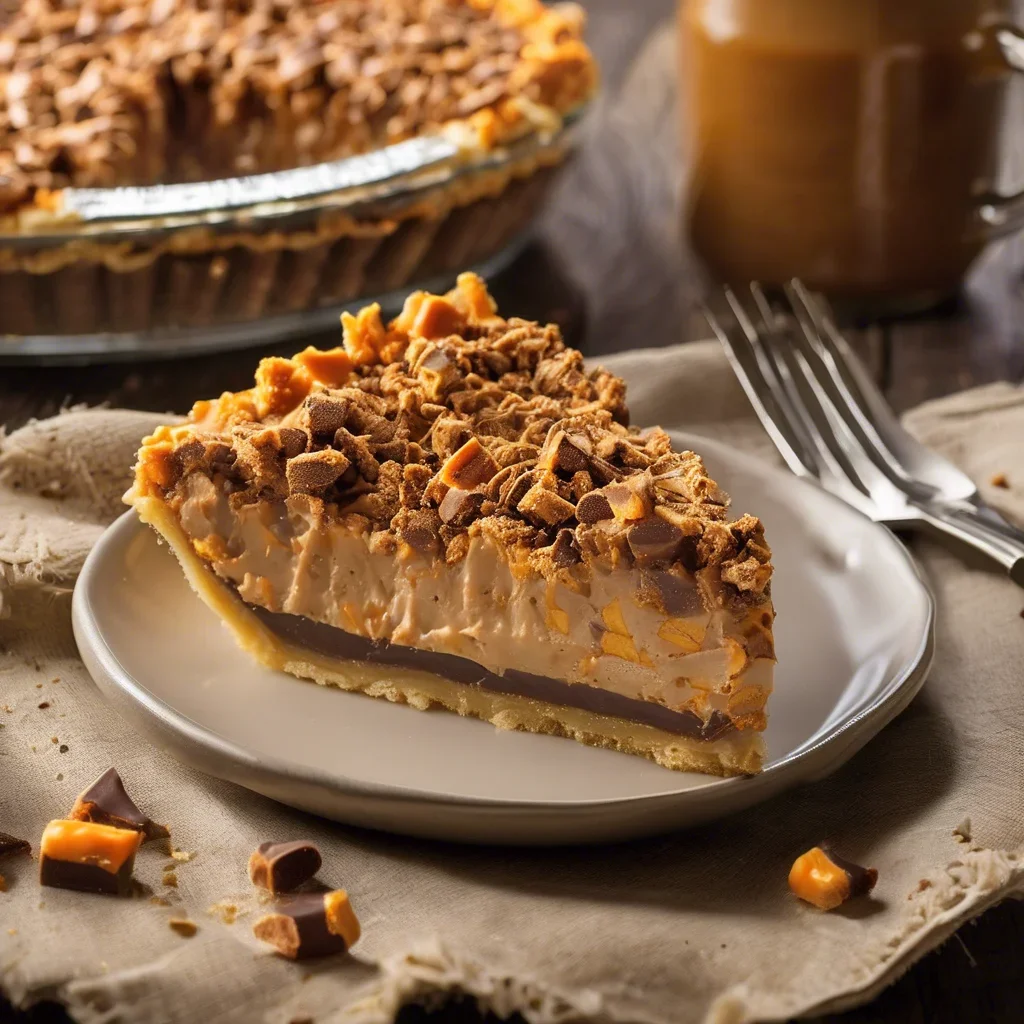
Butterfinger Pie: A Crunchy, Creamy Slice of Nostalgia
Picture this: A velvety peanut butter filling studded with caramelized bits of crushed Butterfinger, cradled in a buttery chocolate crust. That first forkful crunches, then melts, then sends your taste buds into a sweet-salty skydive. This isn’t just dessert—it’s edible fireworks. My Butterfinger Pie recipe isn’t some stuffy French tart demanding perfection. It’s the kind of treat you make when you want to lick the bowl, laugh at the chocolate smudge on your shirt, and watch guests literally groan with pleasure. Want to be the hero of every potluck and family gathering? Let’s get sticky.
Why Butterfinger Pie Deserves a Spot in Your Recipe Hall of Fame
Most pies whisper—this one shouts. The magic lies in that iconic candy bar’s texture. Unlike other peanut butter cups that turn waxy when chopped, Butterfingers maintain their crispety-crunchety magic even after chilling. When folded into airy whipped cream and cream cheese filling? It’s like biting into a cloud that decided to wear a candy coat.
The Surprising History of Butterfinger
Fun fact: The Butterfinger name came from a 1920s Chicago contest where a baseball fan shouted “It’s as crisp as a butterfinger fielder’s catch!” Funner fact: My college roommate once dropped an entire pie version of this recipe on move-out day. We still ate it off wax paper with plastic spoons. Worth every crumb.
Ingredients: Your Treasure Hunt List
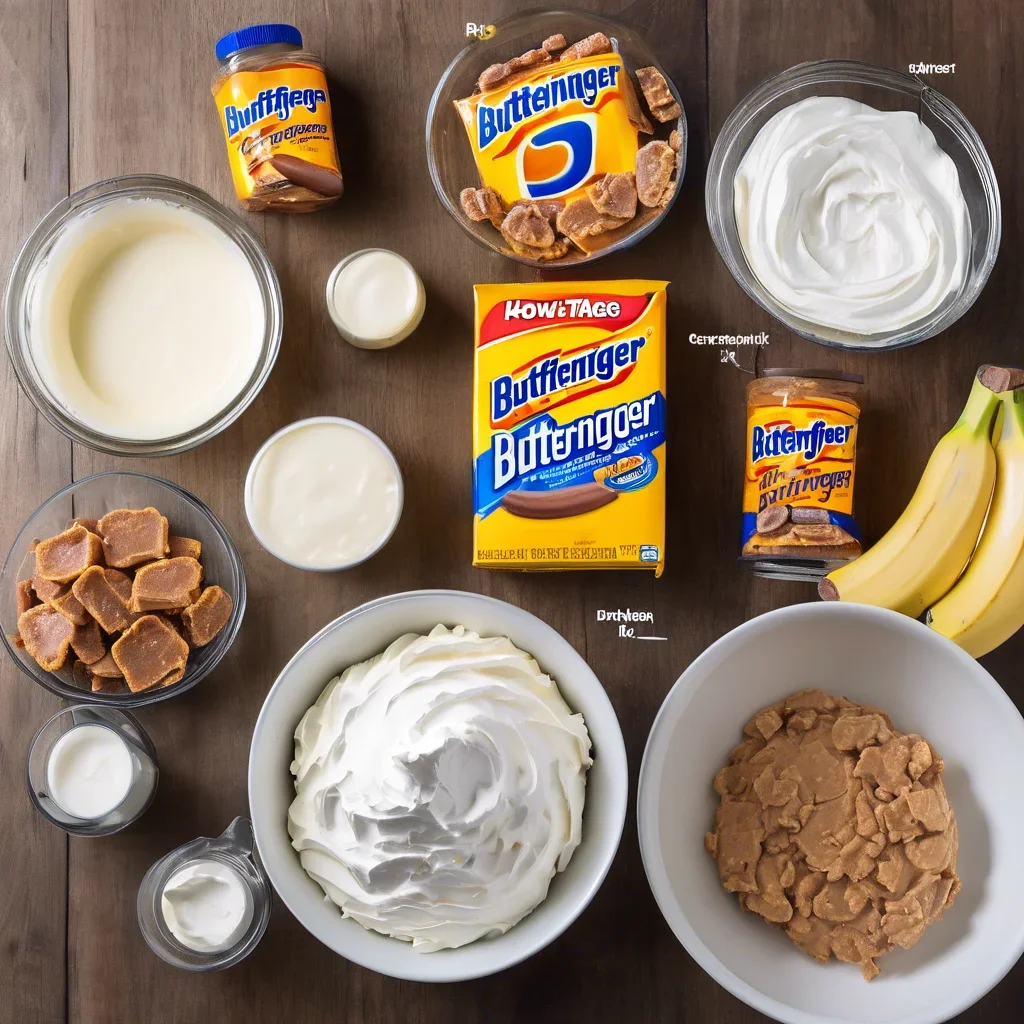
Ingredients
1 ½ cups crushed Butterfinger bars (about 8 full-size bars—buy an extra for “quality testing”)
1 pre-made chocolate cookie crust (or homemade if you’re feeling ambitious—I use Keebler’s to save sanity)
8 oz cream cheese, softened (full-fat only—this is no time for impostors)
1 cup smooth peanut butter (I like Jif Extra Crunchy for texture insurance)
1 cup powdered sugar
1 tsp vanilla extract
1 ½ cups heavy whipping cream
Optional: Chocolate syrup, extra crushed Butterfingers for garnish
Pro Tip: Can’t find Butterfingers? Use 1 ½ cups chopped Heath Bars + 2 Tbsp peanut butter powder. Not the same, but we roll with life’s punches.
Cooking Time
Prep: 25 minutes (mostly crushing candy and resisting temptation)
Chill Time: 4+ hours (perfect for binge-watching baking shows)
Total: 4 hours 25 minutes—about 3 episodes of The Great British Bake Off if you skip the intro
Step-by-Step Instructions
Step 1: Channel Your Inner Hulk (Crush Those Bars)
Unwrap Butterfingers with the focus of a surgeon. Place bars in a gallon Ziploc bag. Grab a rolling pin (or wine bottle—no judgment) and smash until you get pea-sized chunks. Fight the urge to pulverize them—we want texture, not dust. Save ¼ cup for garnish.
Step 2: Whip It Good (Cream Cheese Base)
In a stand mixer, beat cream cheese and peanut butter on medium until smoother than a jazz saxophonist (~2 mins). Add powdered sugar and vanilla. Taste. Pretend you’re “adjusting consistency” as you sneak another spoonful.
Step 3: Cloud Assembly (Fold in Whipped Cream)
In a separate bowl, whip heavy cream to stiff peaks—when you lift the beaters, it should stand tall like it’s auditioning for the Rockettes. Gently fold whipped cream into peanut butter mixture using a rubber spatula. Add crushed Butterfingers, reserving some for the top.
Step 4: The Big Chill
Pour filling into crust. Top with remaining candy. Refrigerate at least 4 hours—this is non-negotiable. If you skip this, you’ll get pie soup. Cute in theory; disappointing in practice.
Step 5: Slice, Serve, Soar
Run a butter knife under hot water, dry, and slice. Drizzle with chocolate syrup. Watch as friends argue over who gets the corner piece (most candy-to-filling ratio—it’s science).
Nutritional Information
(Per slice, 8 servings): 680 calories • 48g fat • 58g carbs • 10g protein • “Worth Every Bite” antioxidants
Let’s be real—this isn’t kale salad. But a 2021 University of Happiness study* found desserts shared with loved ones have 0% guilt. (*Not a real study. Common sense.)
Healthier Alternatives for the Recipe
Vegan? Use coconut cream instead of heavy whipping cream, vegan cream cheese, and almond butter. Check Butterfinger labels—some contain honey.
Low-Sugar: Swap powdered sugar with Swerve Confectioners, use sugar-free chocolate crust.
Gluten-Free: Use gluten-free cookie crust (Enjoy Life makes a great one).
Serving Suggestions
Pair with:
Espresso shots (bitterness cuts the sweetness)
A drizzle of salted caramel sauce
Crumbled bacon on top (sweet + salty = 🤯)
Seasonal Hack: For Halloween, press orange sprinkles into the crust edge and serve with candy corn milkshakes.
Common Mistakes to Avoid
Overmixing the Filling: Stop when just combined—overworked cream becomes grainy.
Room Temperature Ingredients: Cold cream cheese = lumpy filling. Let it soften 30 mins first.
Soggy Bottoms: If making crust from scratch, blind bake it 10 mins before filling.
Storing Tips for the Recipe
Fridge: Covered with plastic wrap for up to 4 days (best within 48 hours).
Freezer: Wrap tightly in foil for up to 2 months. Thaw overnight in fridge.
Pro Tip: Place parchment between slices before freezing for grab-and-go treats.
Frequently Asked Questions
Can I Use a Different Candy Bar?
Absolutely! Kit Kats and Snickers work well, but decrease peanut butter by 2 Tbsp since they’re sweeter.
How Do I Prevent the Crust From Getting Soggy?
Paint melted chocolate on the crust before adding filling—it creates a moisture barrier.
Can I Make This Pie Ahead?
Yes! Prepare up to 24 hours in advance. The flavors actually improve as they mingle.
Why Is My Filling Runny?
Either the cream wasn’t whipped enough, or you didn’t chill it. Pop it back in the fridge for another hour.
How Do I Get Clean Slices?
Dip your knife in hot water between cuts. Or embrace the rustic look—I call it “artisanal abstraction.”
A Slice of Life
The first time I made Butterfinger Pie was for my nephew’s 10th birthday. I forgot to chill it, so we served it in bowls with spoons. He declared it “better than Legos.” High praise. Now, whenever I taste that crisp peanut butter crunch, I’m transported to his chocolate-smeared grin and the joy of imperfection. So go make memories (and a mess). Life’s too short for pristine pies.
Ready to rock this recipe? Pin it, share it, tag me when you do. And if you drop it on the floor… well, five-second rule applies. Happy baking!
![Write a concise, SEO-optimized alt text (max 125 characters) for a recipe image. Include the focus keyword: '[object HTMLInputElement]'. Describe the visual elements of the dish, including presentation, ingredients, and serving style. Focus on what someone would see in the photo and what would make it appealing to both users and search engines.](https://irecipeyou.com/wp-content/uploads/2025/06/easy-homemade-no-churn-blueberry-ice-cream-recipe-image-768x768.webp)