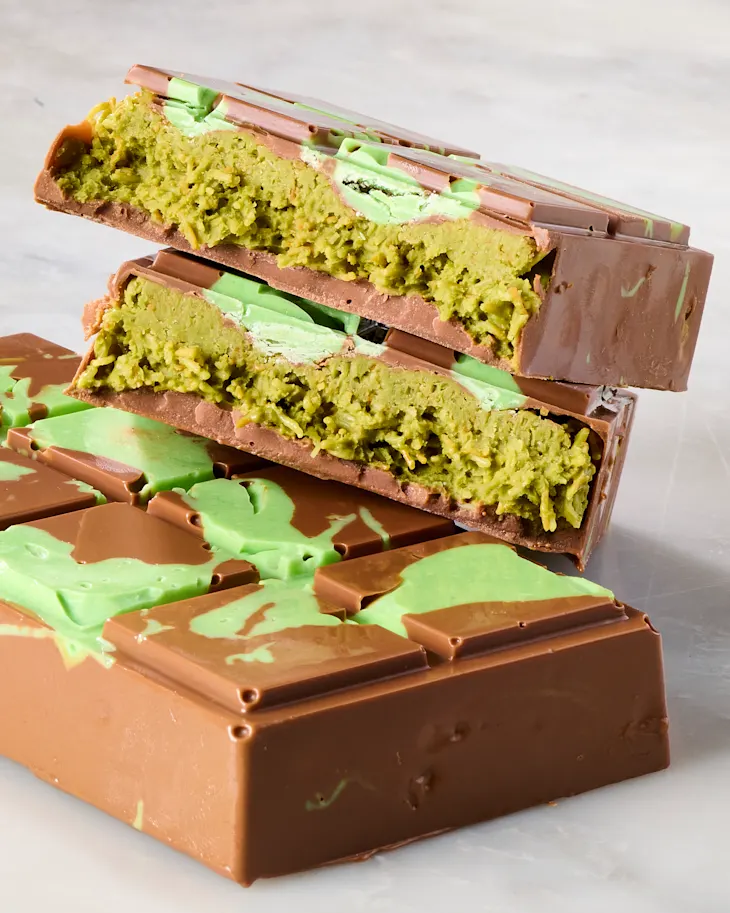
I Tested the Famous Dubai Chocolate Bar Recipe (Here’s What Happened)
Discover how to make Dubai chocolate bars with crispy kataifi and pistachio butter – plus pro tips for that impossibly addictive crunch. Your new favorite homemade bar awaits!
This Dubai Chocolate Bar Is What Food Dreams Taste Like
Let me paint you a picture: It’s 3 PM on a Tuesday, and I’m elbow-deep in phyllo dough remnants. My kitchen counter looks like a pastry explosion hit it. Why? Because I became violently obsessed with recreating this Middle Eastern chocolate bar I tried once at a Dubai airport during a layover. You know how it goes – one bite of crispy, nutty perfection, and suddenly you’re Googling “kataifi pastry suppliers near me” at 2 AM.
After three failed attempts involving shredded wheat cereal (don’t ask), I finally nailed it. The moment that golden kataifi crunched between my teeth with that earthy pistachio butter melting against milk chocolate? Friends, I actually did a little victory dance right there by the stove. My cat looked concerned. Here’s everything I learned through delicious trial and error:
Why This Is the Only Dubai Chocolate Bar Recipe You’ll Ever Need
This isn’t just chocolate. It’s a textural symphony. Imagine the crispest autumn leaf falling into a pool of melted Nutella, then getting hugged by a silk blanket. The magic comes from:
- A salty-sweet balance that makes you want to lick the bowl (no judgment)
- That SHATTERING first bite from toasted kataifi strands
- A pistachio cream so lush it should probably come with a romance novel
Bonus? You get to say “kataifi” (kah-tah-EE-fee) and feel fancy while making it. Pistachio desserts have never been this addictive!
What You’ll Need (Ingredients)
Grocery store treasure hunt time! Don’t panic if you need to visit a Middle Eastern market – mine had the kataifi right next to the phyllo. Pro tip: Wear pants with pockets. You’ll want to “accidentally” stash extra pistachio butter there.
- 3 tablespoons unsalted butter or coconut oil, divided
- 5 ounces coarsely chopped kataifi pastry dough (about 2 packed cups), thawed if frozen
- 1 (7- to 8-ounce) jar creamy pistachio butter or pistachio cream
- 2 tablespoons well-stirred tahini
- 1/4 teaspoon kosher salt
- 3 tablespoons white chocolate chips that contain cocoa butter, such as Guittard
- 1 to 4 drops liquid or gel green food coloring (optional)
- 12 ounces good-quality milk chocolate chips (about 2 cups), divided
Prep, Cook Time & Tools
Total time: 26 active minutes + chilling
Tools: One well-loved skillet (mine has permanent chocolate stains – it’s a lifestyle), silicone molds (I found mine on Amazon for $7), and a stubborn willingness to not eat all the pistachio butter straight from the jar
Step-by-Step: Let’s Make Magic Happen
Step 1: Toasty Kataifi Tango
Melt 2 tablespoons butter in your trustiest skillet. When it starts singing that sizzle song, toss in the chopped kataifi. Here’s where the magic starts – those shredded dough bits will transform from pale noodles to golden crispies in 8-10 minutes. Stir occasionally unless you enjoy playing “find the burnt strand.” When it’s the color of a perfect French fry, dump it into a bowl and immediately mix with pistachio butter, tahini, and salt. The heat helps everything melt into a fragrant, green-tinged hug. Resist diving in face-first – we’ve got layers to build!
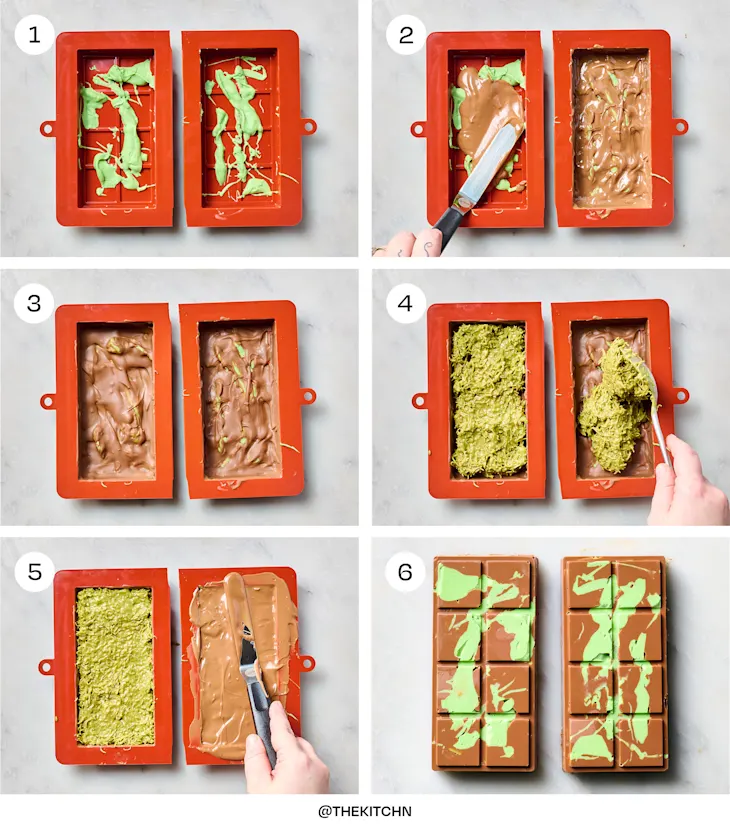
Step 2: White Chocolate Canvas
Break out your makeshift double boiler (aka a bowl over simmering water). Melt white chocolate chips while stirring like you’re whisking clouds. Add green food coloring if you’re feeling extra – mine looked like unicorn glitter. Drizzle this artistic mess into your molds. Pattern philosophy? “Hot mess chic.” Freeze while muttering “patience is virtue” repeatedly.
Step 3: Milk Chocolate Armor
Same bowl, new mission. Melt remaining milk chocolate and butter into velvety lava. Save 1/4 cup chips for tempering later (translation: prevents chocolate from going gray). Pour just enough to coat mold bottoms and sides. Freeze 10 minutes – perfect time to clean up tahini fingerprints from your phone.
Step 4: Pistachio Filling Heist
Scoop that glorious green filling into the molds. Use a spatula to press gently – imagine tucking in a pistachio baby. Leave 1/8″ space at the top. Pour remaining chocolate over everything, scraping excess like you’re icing the world’s richest cake. Chill 40+ minutes. Pro tip: Hide these in the veggie drawer. Trust me.
Storage, Shelf Life & Leftovers
- Refrigerate in airtight container up to 3 weeks (they’ll last 3 days max before being devoured)
- Freeze for 2 months wrapped in parchment – thaw 10 minutes before serving
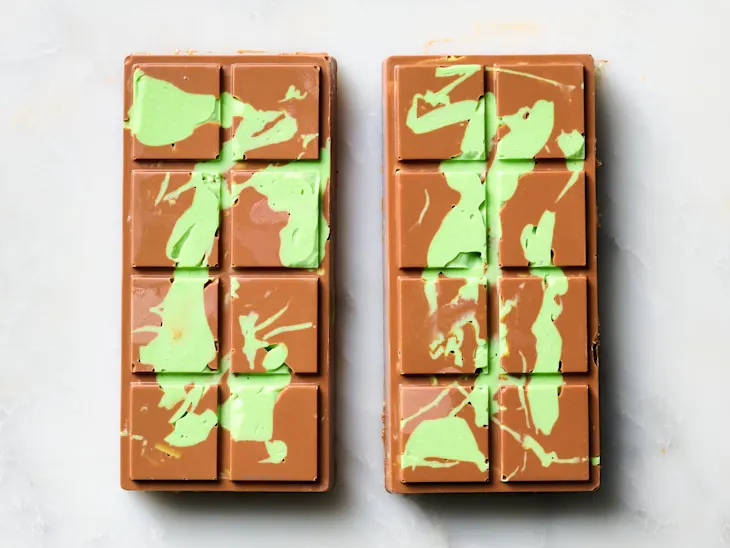
Final Bite: Why I’ll Always Love This Dubai Chocolate Bar
Six months later, I still make these weekly. They’ve become my edible love language – I’ve given them as housewarming gifts, birthday surprises, and “sorry I forgot your name” peace offerings. The crunch! The creamy center! The way people’s eyes light up when they bite in? Worth every kataifi strand stuck to my ceiling. Make them. Share them. Hide some for yourself. Then come back here and tell me your food coma stories – I’ll be in the kitchen, covered in pistachio butter and grinning like a mad scientist.