The Ultimate Comfort Food: My Favorite Garlic Bread Grilled Cheese Recipe
Indulge in the gooey, cheesy goodness of this Garlic Bread Grilled Cheese recipe, where crispy garlic bread meets a melty, savory filling that will leave you wanting more. Discover the secret to making this indulgent treat at home.
This Garlic Bread Grilled Cheese Is What Comfort Tastes Like
I still remember the first time I bit into a Garlic Bread Grilled Cheese sandwich. It was a lazy Sunday afternoon, and I was craving something that would transport me to a cozy, nostalgic place. The combination of crispy, buttery garlic bread and melted cheese was absolute magic. My love affair with this recipe began that day, and I’ve been perfecting it ever since. If you’re a fellow comfort food lover, you’re in for a treat!
Why This Is the Only Garlic Bread Grilled Cheese Recipe You’ll Ever Need

What sets this grilled cheese recipe apart is its simplicity and versatility. It’s perfect for a quick weeknight dinner, a game-day snack, or even a cozy night in with friends. The rich flavors and textures will make it a staple in your household, just like it has in mine.
What You’ll Need (Ingredients)
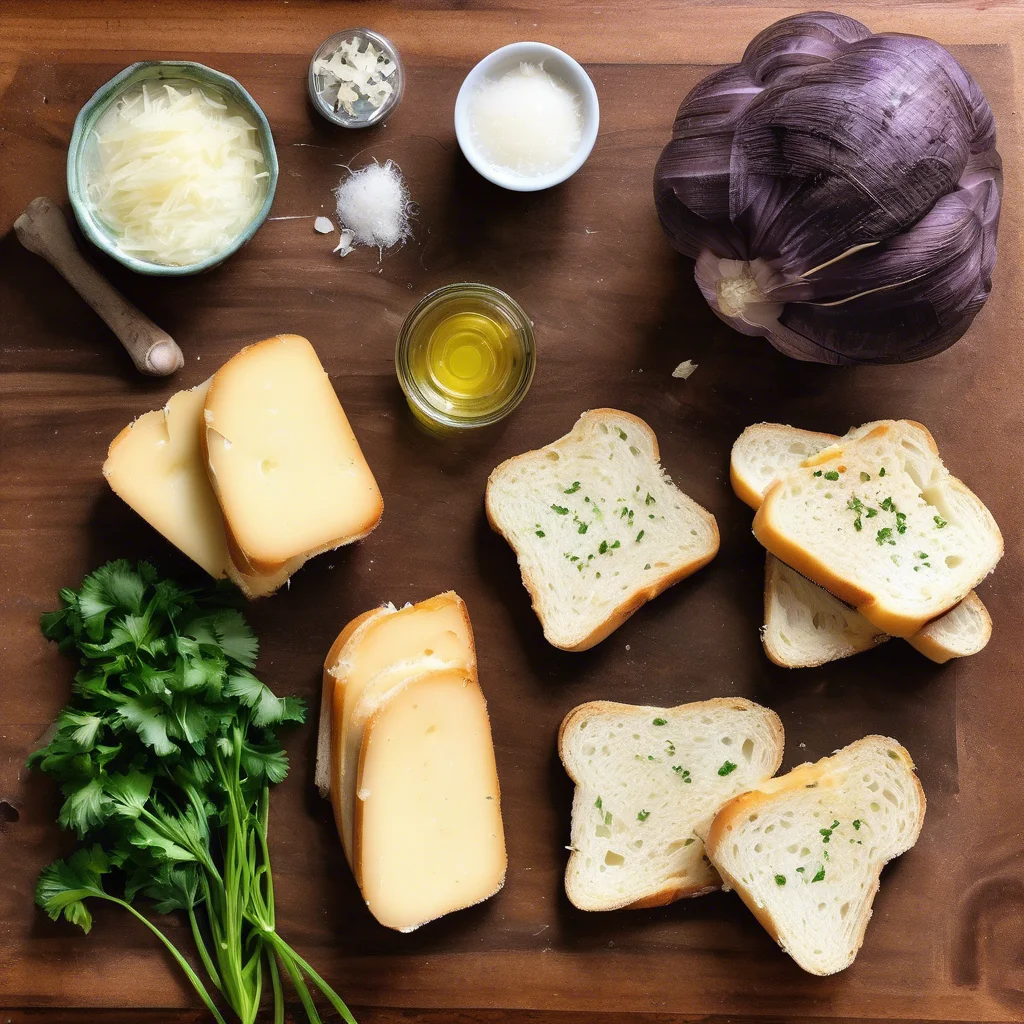
The beauty of this recipe lies in its straightforward ingredient list. You’ll need just a few simple components to create a truly satisfying meal. Here’s what you’ll need:
- Unsalted butter: 4 tablespoons (113 g)
- Chopped fresh parsley: 2 tablespoons (30 g)
- Grated Pecorino Romano cheese: 1 tablespoon (15 g)
- Minced garlic: 1 clove (3 g)
- White bread: 4 slices (approx. 113 g total)
- Provolone cheese: 4 slices (approx. 113 g total)
- Shredded mozzarella cheese: 0.5 cup (56 g)
Prep, Cook Time & Tools
This recipe is a breeze to make, and you can have it on the table in no time. Here are the essential details:
Prep Time: 5-10 minutes
Cook Time: 10-20 minutes
Servings: 2-4
Temperature: Medium heat (around 350°F or 175°C)
To make this Garlic Bread Grilled Cheese, you’ll need a few basic kitchen tools:
- Large skillet or griddle
- Spatula
- Knife for slicing bread
I used my trusty, well-seasoned skillet to make this recipe. It distributes heat evenly, ensuring that the bread is toasted to perfection and the cheese is melted to a golden brown.
Step-by-Step: Let’s Make This Together
Now that we have our ingredients and tools ready, it’s time to dive into the cooking process. Follow along, and I’ll guide you through each step with ease.
Step 1: Heat It Up
Start by heating a large skillet over medium heat. As you wait for it to warm up, take a moment to appreciate the aroma of your kitchen. The sizzle and crackle of the pan will get you excited for the gooey, cheesy goodness that’s about to come. Make sure the skillet is preheated properly to avoid burning the bread – we want that perfect golden-brown crust!
Step 2: Building the Flavor
In a small bowl, combine 4 tablespoons of unsalted butter, 2 tablespoons of chopped fresh parsley, 1 tablespoon of grated Pecorino Romano cheese, and 1 clove of minced garlic. Mix until the ingredients are well incorporated, and you’ll be greeted by the heavenly aroma of garlic and herbs. This is where the magic begins!
Step 3: Butter Up Your Bread
Lightly coat one side of each bread slice with the butter mixture. Don’t be shy – make sure to cover the entire surface for an even, golden-brown crust. As you flip the bread slices over, you’ll be left with a tantalizing aroma that will make your mouth water.
Step 4: Assemble the Sandwich
Top two bread slices with provolone and mozzarella cheese. The combination of these cheeses will create a rich, creamy filling that will make your taste buds dance. Place the remaining two bread slices, buttered-sides up, on top of the cheese. You’ll be creating a beautiful, cheesy sandwich that’s sure to impress.
Step 5: Cook to Perfection
Cook the sandwiches on one side until they’re golden brown, about 3 to 4 minutes. As the bread toasts, the cheese will start to melt, and you’ll be treated to a savory aroma that will make your stomach growl with anticipation. Flip the sandwiches and cook on the second side until the cheese is melted and golden brown, about 3 to 4 minutes more.
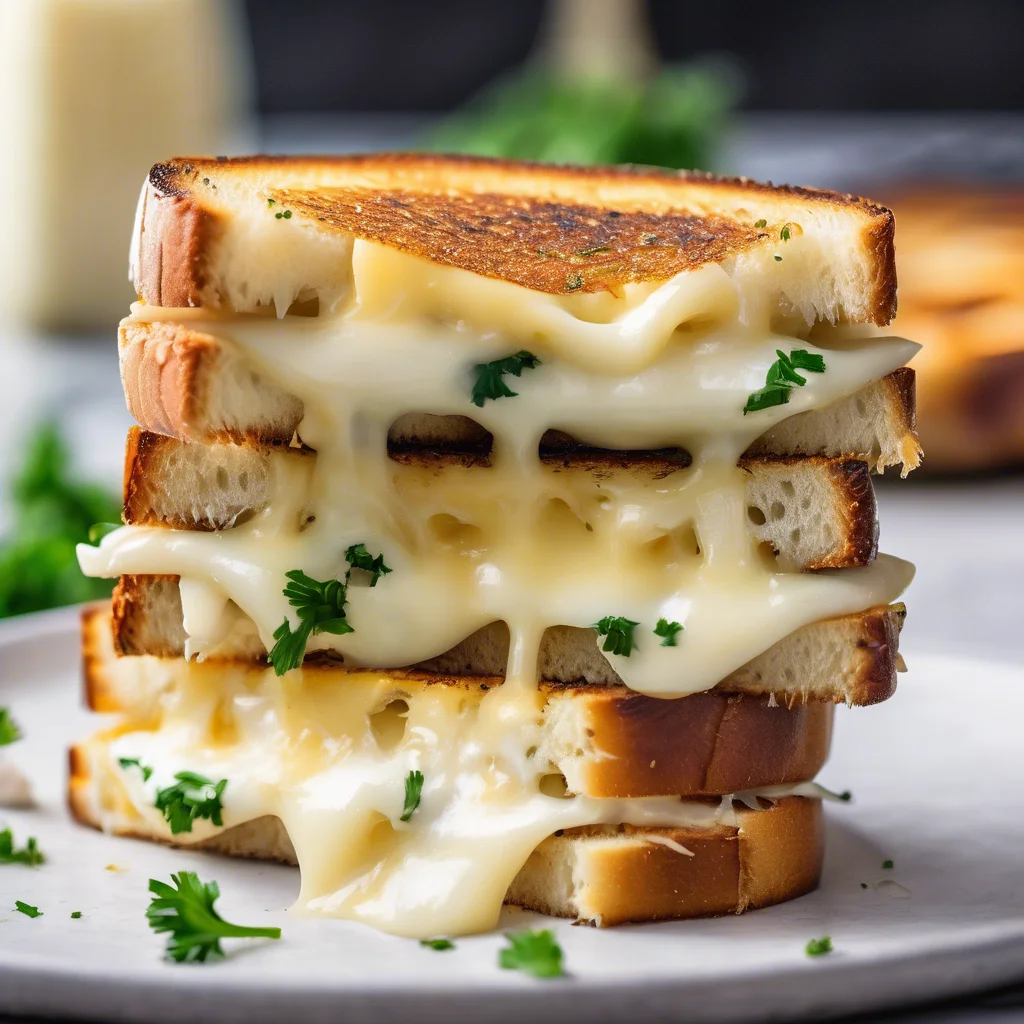
Step 6: Serve and Enjoy
Cut the sandwiches in half, and serve them hot. The first bite is always the best – the gooey cheese, the crispy bread, and the tangy flavors all come together in perfect harmony. It’s a culinary experience that will leave you wanting more!
Storage, Shelf Life & Leftovers
If you’re lucky enough to have leftovers, you can store them in an airtight container in the refrigerator for up to 2 days. To reheat, simply place the sandwich in a skillet or oven until it’s crispy and warm. I’ve found that reheating it in a skillet with a bit of butter adds an extra layer of flavor – give it a try!
Final Bite: Why I’ll Always Love This Garlic Bread Grilled Cheese
This recipe has become a staple in my kitchen, and I hope it will in yours too. It’s a comforting, indulgent treat that’s perfect for any occasion. So go ahead, give it a try, and indulge in the cheesy, garlicky goodness. I’d love to hear how it goes, so leave a comment below and share your experience!
![Write a concise, SEO-optimized alt text (max 125 characters) for a recipe image. Include the focus keyword: '[object HTMLInputElement]'. Describe the visual elements of the dish, including presentation, ingredients, and serving style. Focus on what someone would see in the photo and what would make it appealing to both users and search engines.](https://irecipeyou.com/wp-content/uploads/2025/06/beef-and-broccoli-stir-fry-image-768x768.webp)
![Write a concise, SEO-optimized alt text (max 125 characters) for a recipe image. Include the focus keyword: '[object HTMLInputElement]'. Describe the visual elements of the dish, including presentation, ingredients, and serving style. Focus on what someone would see in the photo and what would make it appealing to both users and search engines.](https://irecipeyou.com/wp-content/uploads/2025/06/no-bake-pecan-pie-dip-image-768x768.webp)
![Write a concise, SEO-optimized alt text (max 125 characters) for a recipe image. Include the focus keyword: '[object HTMLInputElement]'. Describe the visual elements of the dish, including presentation, ingredients, and serving style. Focus on what someone would see in the photo and what would make it appealing to both users and search engines.](https://irecipeyou.com/wp-content/uploads/2025/06/cheese-steak-homemade-hamburger-helper-cooking-in-the-midwest-image-768x768.webp)